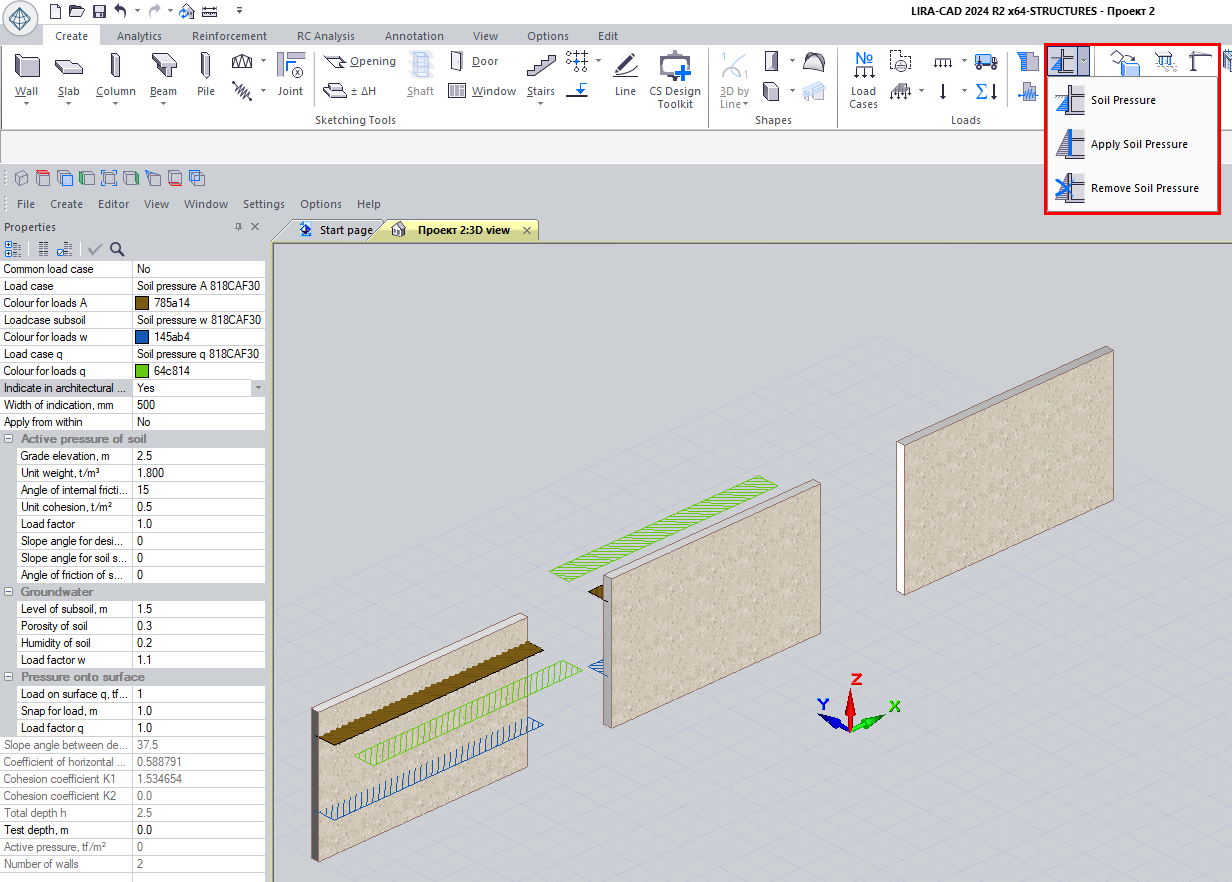
For various purposes it can be useful to model the soil pressure on the basement walls. The commands necessary for this purpose are presented on the "Create" tab, "Loads" panel, see Fig. 1.
The commands available on the drop-down menu:
Soil pressure – to create an information object of the appropriate type and place it in the information model of the object under construction.
There is an option to apply the newly formed load to the selected walls right away if any walls are selected at the time the command is activated.
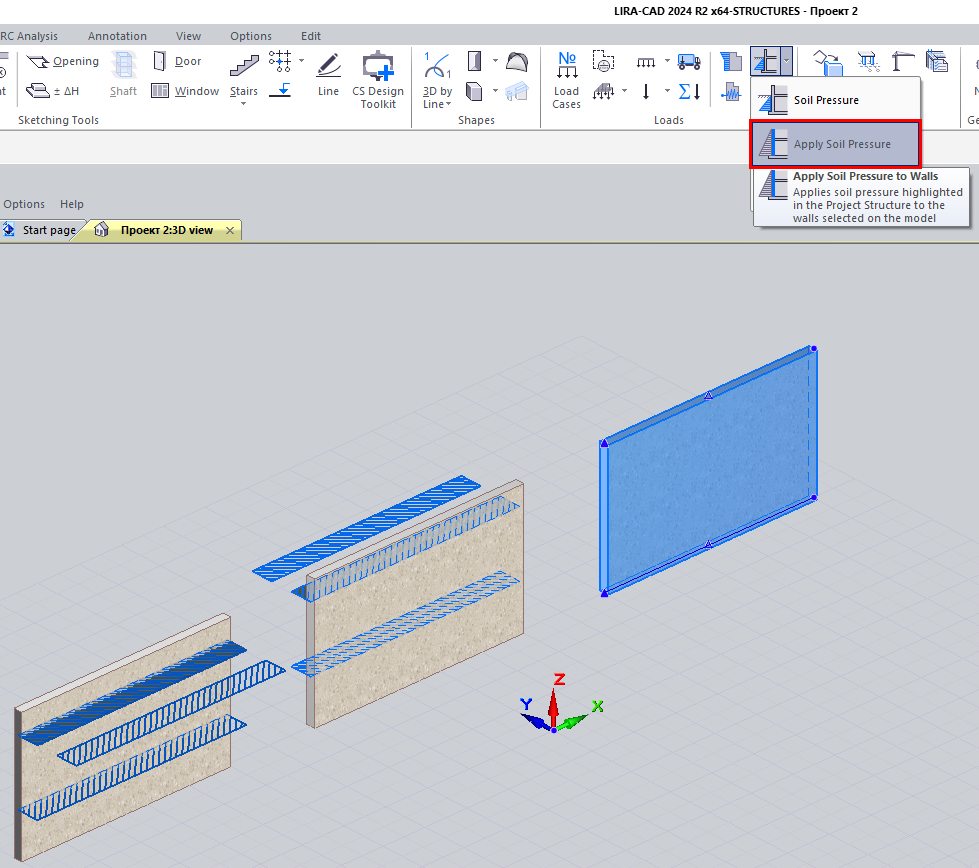
Apply soil pressure – to apply the soil pressure (already existing in the model, previously created by the "Soil pressure" command) to the elements of the "Wall" type available in the model. To do this, select walls and soil pressure. Then activate this command. Selected soil pressure will be applied to the selected walls.
How to select walls? Specify them with the mouse pointer one by one or with a "selection window". Or through the project tree.
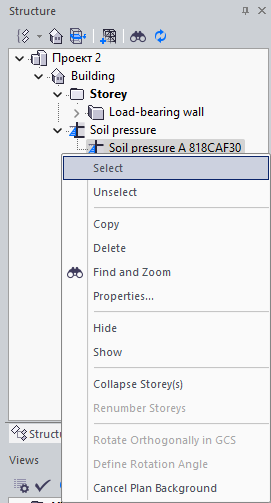
How to select the soil pressure? If the soil pressure is already applied to some walls, it can be seen in the graphical window as lines near the walls on the side where the soil pressure is applied to. In this case, to specify the soil pressure, just click these lines. If the soil pressure has not been applied to any wall yet, and therefore it is not visible in the graphic window, it can be highlighted using the "Select" command of the shortcut menu. To display this menu, in the "Project structure" window, highlight the information model element of the "Soil pressure" type, and right-click the mouse pointer.
In the "Properties" window, it is possible to check which elements are selected. There you will see the number and types of elements selected on the model.
Remove soil pressure – to select the walls that the soil pressure is applied to. By this command the soil pressure will be deleted from selected walls.
To apply selected soil pressure to the selected walls, use the "Apply soil pressure" command (Fig. 4).
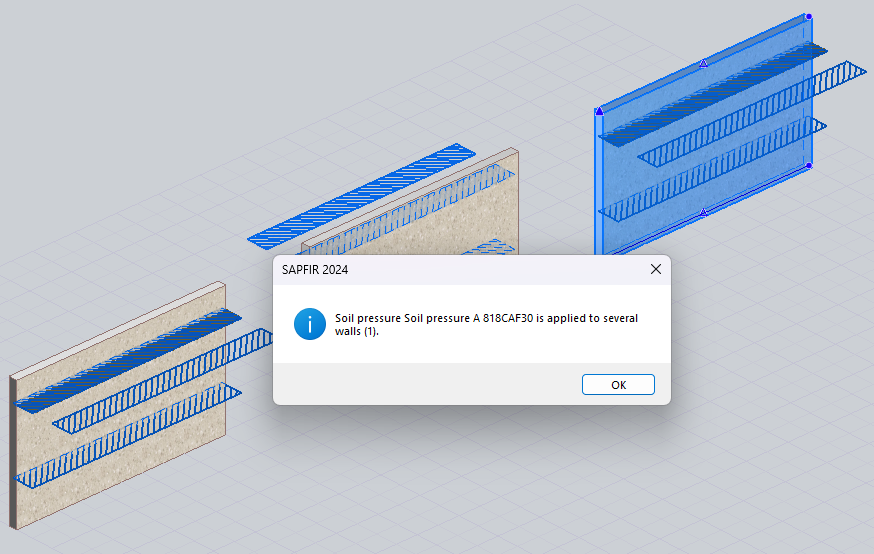
When the soil pressure is applied successfully, you will see the result as the "lines" in the graphical window and receive an appropriate message indicating the number of elements (of the "Wall" type) that the soil pressure was applied to.
Soil pressure is usually applied to the front (outer) side of the wall. The side to the right of the axial line is considered the outer side of the wall. The axial line of a wall segment has a beginning and an end in the order in which its points are created. The first (initial) point of the wall axial line is indicated with a triangle when selected.
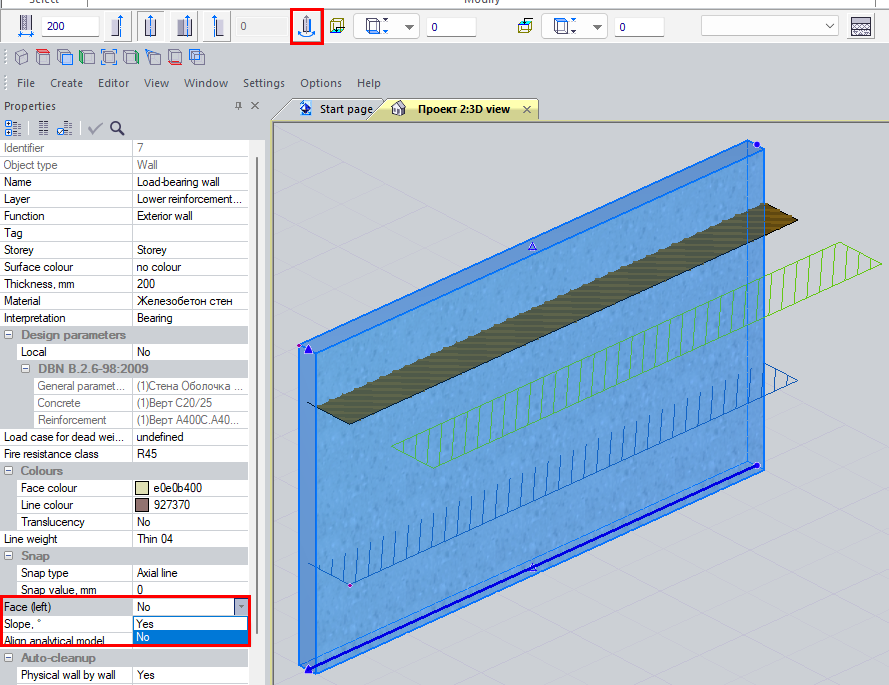
In the wall properties, it is possible to switch the direction of the front side so that it is to the left of the axial line. You can also invert the direction of the axial line.
It should be remembered that the direction of the front side will influence the following:
- Location of the models for filling the openings (window units with drip strips and window sills).
- Order of material layers in multi-layer building envelopes.
- Special loads.
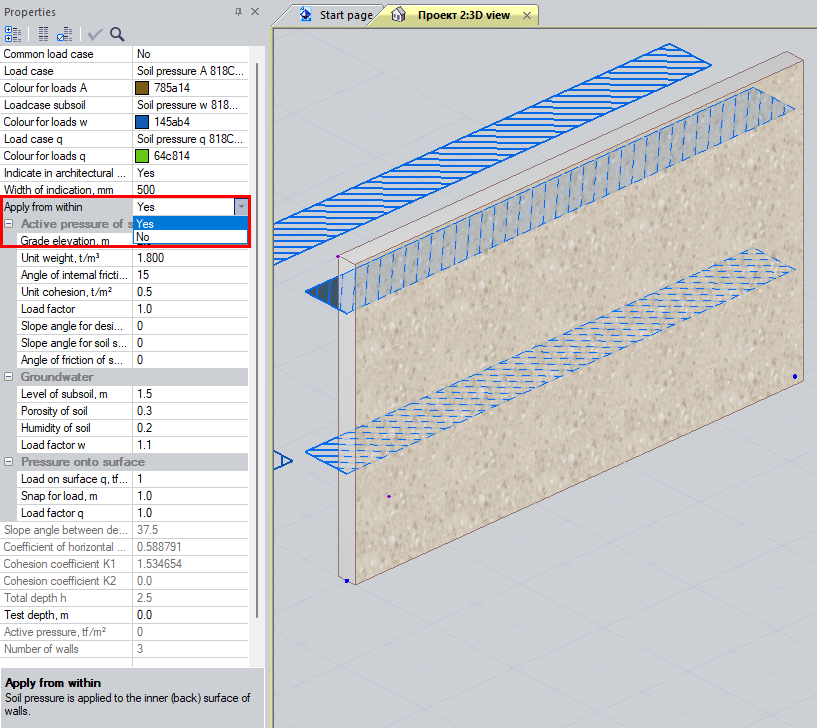
If the direction of the front side of the wall is not to be changed, the soil model's "Apply from within" parameter can be used to modify the direction of the soil pressure when it is required.
How to determine the modulus of subgrade reaction in LIRA-FEM?
If you find a mistake and want to inform us about it, select the mistake, then hold down the CTRL key and click ENTER.


Comments