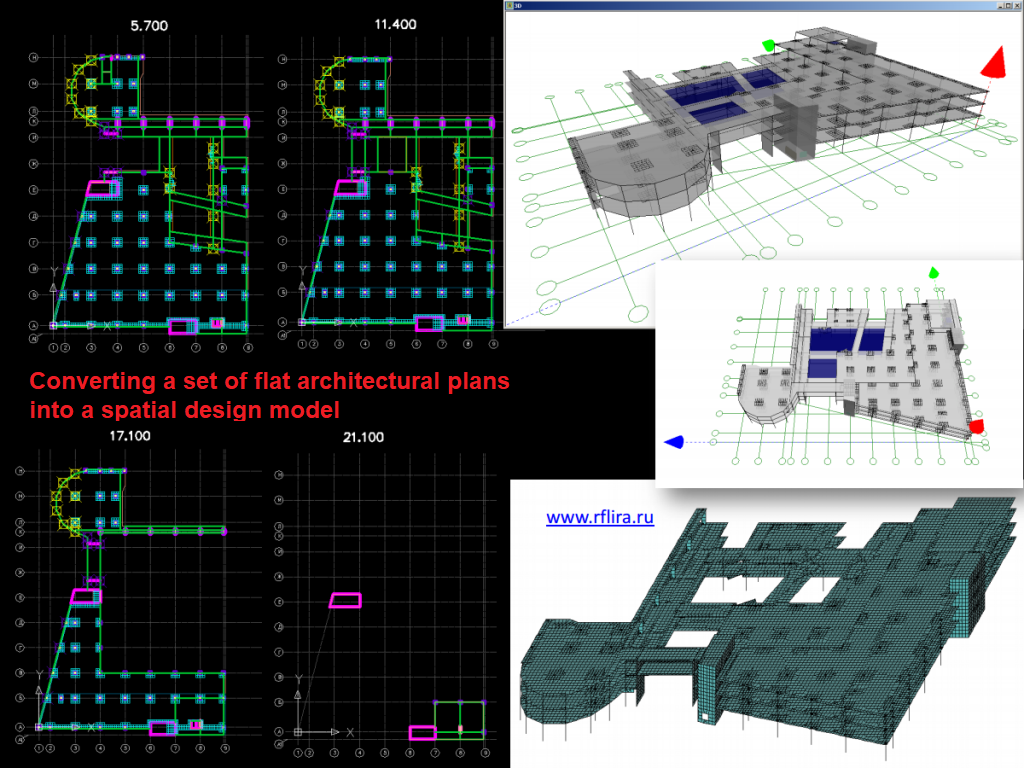
General information
LIRA-FEM software imports construction axes, walls, slabs, columns, and beams from DXF text files. To import these objects to the application, they should be represented by a specific object and belong to a layer with a predefined name.
The following table describes how an object should be defined in a DXF file and into which object of LIRA-FEM model it is converted at import.
| Structural element | DXF representation | DXF object | DXF layer | LIRA-FEM object |
|---|---|---|---|---|
| Construction axis | LINE | AXES or CO_AXE | Construction axis | |
| Column | Center or cross-section contour in plan | POINT or POLYLINE | COLUMNS or CO_POTEAU | Finite element - bar |
| Beam | Center axis | LINE | BEAMS or CO_POUTRE | Finite element - bar |
| Wall | Mid-plane projection in plan | LINE | WALLS or CO_VOILE | Array of shells |
| Slab | Mid-plane contour | POLYLINE | SLABS or CO_DALLE | Array of shells |
| Foundation slab | Mid-plane contour | POLYLINE | FOUNDATION_SLABS | Array of shells |
| Slab opening | Contour | POLYLINE | SLAB_OPENINGS or CO_TREMIE | |
| Foundation slab opening | Contour | POLYLINE | FOUNDATION_SLAB_OPENINGS | |
| Window opening | Projection in the plan | LINE | WALL_WINDOWS or CO_FENETRE | |
| Door opening | Projection in the plan | LINE | WALL_DOORS or CO_PORTE |

Notes
- In LIRA-FEM software partitions and loads cannot be imported.
- Construction axes names cannot be imported. Construction axes are imported to LIRA-SAPR.
- During the import, a column specified by the cross-section contour is converted to the vertical bar, that passes through the barycenter of this contour.
- Names of layers of door openings may have a suffix (H-number), where the number is the height of the door opening from the center of the floor slab, mm.
- Names of the layers of window openings may have a suffix (B-number 1; H-number 2), where number 1 is the height of the bottom of the window opening from the center of the floor slab, mm; number 2 - the height of the window opening, mm.
- The wall line should not be interrupted by the door or window openings.
- Rounding of polylines is forbidden.
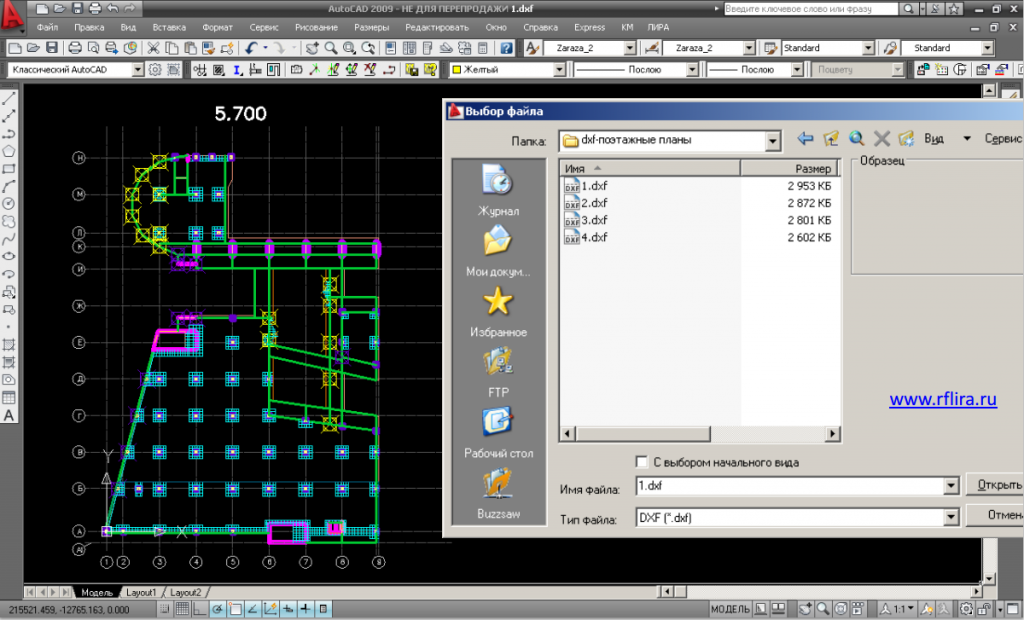
- By default, only one floor can be imported to LIRA-SAPR. A DXF file that contains a floorplan can have any name. To import several floorplans at the same time, the plan of each floor should be saved in a separate file named 1.dxf for the first floor, 2.dxf for the second floor, etc. All these files should be in the same folder. The coordinates of the floorplans in the global coordinate system should be interconnected.
- User can specify the triangulation step, floor height, and units of measurement of the created floor plan in LIRA-SAPR.
- Names of the layers of columns, beams, walls, and slabs may have suffixes that determine their cross-section. Such suffixes can be assigned using the menu commands LIRA-FEM > Layer Properties menu commands. If the LIRA-FEM menu is not used, suffixes beginning can be assigned with space or underline, for example, _1, _2, _3, etc., to the names of the layers of beams, columns, slabs, and walls. In this case, the imported bars and shells get different stiffness, which can be reassigned directly in the LIRA-FEM after import.
Preparation of DXF file in AutoCAD and IntelliCAD environment
During the installation LIRA-FEM can connect its LIRA menu to programs that support AutoLISP, such as AutoCAD or IntelliCAD. The commands in this menu help to create floorplans. The procedure for using the menu is the following:
- Create the necessary layers using the menu commands LIRA SAPR>Create layer.
- Fill in the layers with LINE, POINT, POLYLINEobjects according to the table above and modify the names of the layers using the menu commands LIRA SAPR>Layer Properties.
- Save the resulting file in DXF.
Attention! A DXF file version older 2000 replaces spaces and brackets in the layer names to underscores, destroying the layer properties. Save floor plans in DXF files of format 2000 and newer! - If floor plans of multi-story building are being created, repeat steps from 1 to 3 for each floor. The names of the DXF files, in this case, should be 1.dxf, 2.dxf, etc.
Import of floor plans from DXF files to LIRA-FEM problem
- In the VISOR-SAPR menu, select the command File / Import problem.
- In the dialog box, specify the file type DXF Floor Plan (*.dxf). Specify the desired file in the file list and click the Open button.
- In the opened dialog box Floor plans import from DXF, specify the Scale and Units of measurements of dxf file. The requested scale and units of measurement are related as follows: 1 unit dxf – 1 unit meas. For example, the plan is performed in a metric system and 1 unit dxf corresponds to 1 m, then scale variants, which will not distort the size are: 1:1 – m, 1:100 – cm, 1:1000 – mm.
- Set the Height of the storey. When importing a group of dxf-files of multi-storey building, you can specify different heights for different storeys.
- Set the Triangulation step. To activate the field import parameters click the Override button. By default, the triangulation step (the maximum size of a plate finite elements side) is specified in the OPTIONS/General settings dialog boxin the ArchiCAD tab. Set Pack precision for coincident nodes. Options Optimize triangulation, Assign stiffness automatically and Quadrilateral FEs are controlled by setting check boxes.
- To make sure that the data is entered correctly, click the Preview button. The scheme will open in the 3D-view window. If errors are found, correct them and click Apply and Reload DXF.
- Click the OK to create a problem in LIRA-SAPR. The data will be checked.
- If the data contain errors, the Errors and warnings dialog box will appear with a list of detected errors. Click on the Preview button and click on the line with the error description to highlight the error location in the 3D-View window. Click the Cancel button and go back to step 3 to correct the errors.
If there are no errors in the scheme, then clicking OK in the dialog box Floor plans import from DXF performs the construction of the design model. It may take a long time to create complex design models.
If you find a mistake and want to inform us about it, select the mistake, then hold down the CTRL key and click ENTER.

Comments